How I make Coffee
In this article I’ll cover how I make coffee. I’ve tried a number of different brewing techniques over the years, and feel that I have finally settled on 1-2 brewing methods that really works well. For starters, I should mention that my coffee requirements are as follows.
- Brew coffee for Omar and Lora separate - we wake up at different times
- 1 cup in the morning before heading to work
On the weekends we like to make enough coffee for 4 cups (2 each) as we spend a couple of hours in the morning relaxing in our jammies with our kids being lazy. My favorite part of the week.
With that in mind we have been through the following:
Jura Capresso ENA 3 - Super Automatic Expresso Machine. We used this machine for 5 years. It was programmed to make an Espresso with 8oz of hot water, called a Cafe Crema. Sort of like an Americano. The coffee this machine produced was always “good” - certainly better than a pot of coffee sitting on a burner. But the coffee was never hot enough for my taste. Could not beat the convenience.
Espro Press French Press - The best French Press I’ve ever owned. It’s a vacuum sealed carafe with a double filter that ensures that grounds stay out of your coffee. Personally I’m not a fan of the “gritty” french press taste. I’ll admit that on occasion I like this, but not for my morning or weekend cup of joe. Also I was not a huge fan of the cleanup. We no longer use this.
Aero Press - A lot of folks are fans of the Aero Press. It’s a great little one cup brewing system. It’s strange looking for sure. Looks like a plastic plunger. You can’t beat the price and it produces a good cup of coffee. It’s also easy to travel with. However, there are nearly infinite ways to make coffee with this thing, and the instructions it comes with are pretty useless. I settled on the following brewing techniques from Blue Bottle or Stumptown (the inverse technique).
 The history of the Aero Press is pretty fascinating. It was invented by the guy who came up with the Aerobie Frisbee.
Hario V60 - The Hario ended up being my preferred brewing method. It’s a pour over device. You place it over your mug, place in 16-20g of ground coffee, and pour in 220g of 200 degree water. Ideally you bloom the coffee for 30 seconds.
Like anything, when paired with fresh beans, a great grinder, and kettle, this is the purest form of coffee drinking. For the first time in my life I could taste all the flavors in each single origin coffee we get from Blue Bottle. Coffee from Africa tastes different than coffee from Costa Rica.
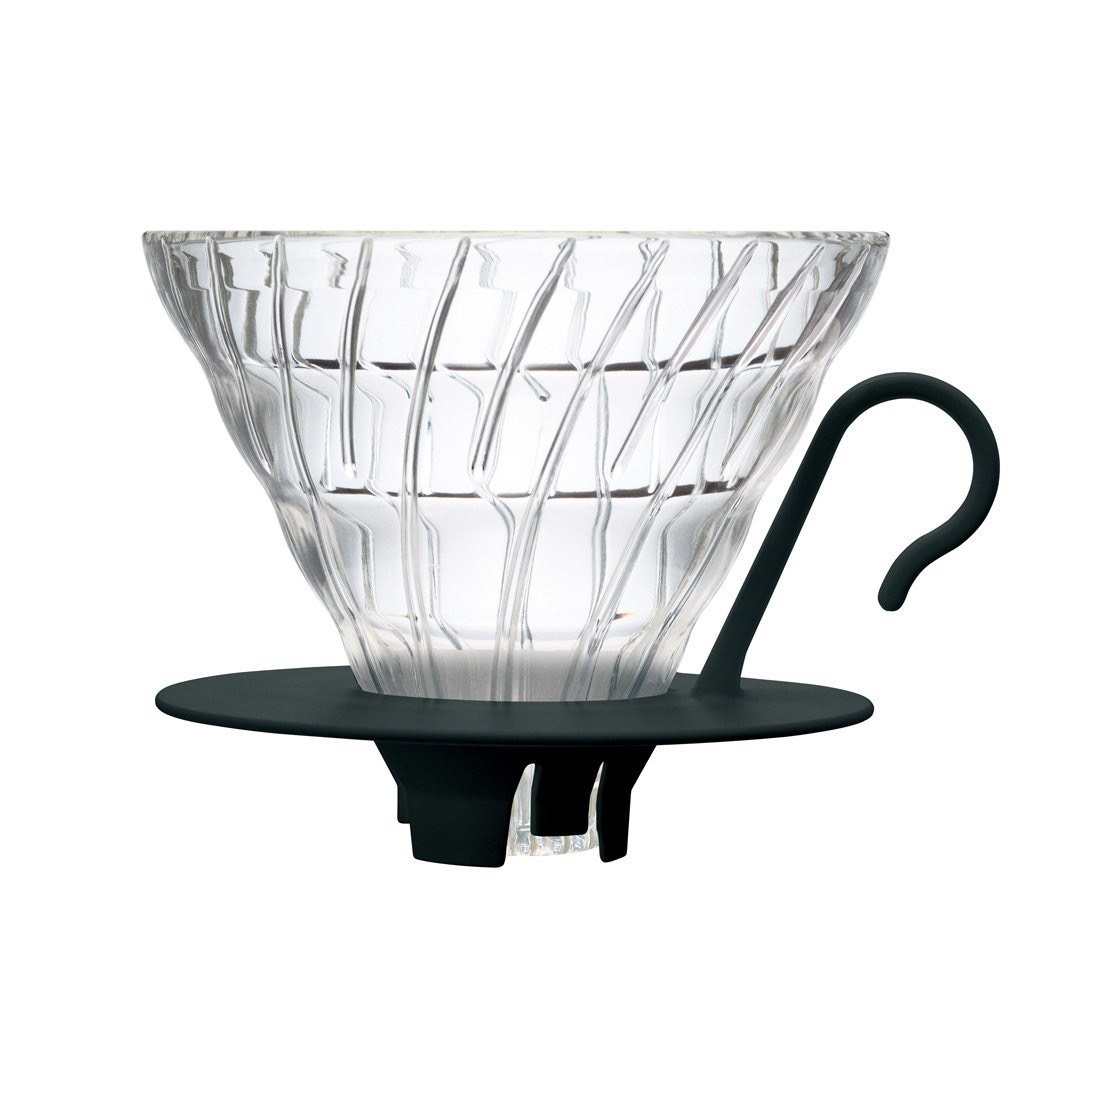 I purchase the Hario unbleached filters to go along with this.
So for me, this is the gold standard of making coffee. But it’s not very efficient for making 4 or more cups. It’s great for 1 cup.
Before I discuss our final coffee device, I wanted to briefly cover Beans, Water, Grinding and Measurement.
Beans - For over a year we’ve been getting our beans shipped to us by a company called Tonx which was purchased by Blue Bottle. We have the single origin subscription and get two 8oz bags of coffee every 2 weeks. They are roasted right before shipped, and we grind them right before using them. During that time we store them in an air tight container - we use the AirScape which you can get from Crate & Barrel or William-Sonoma.
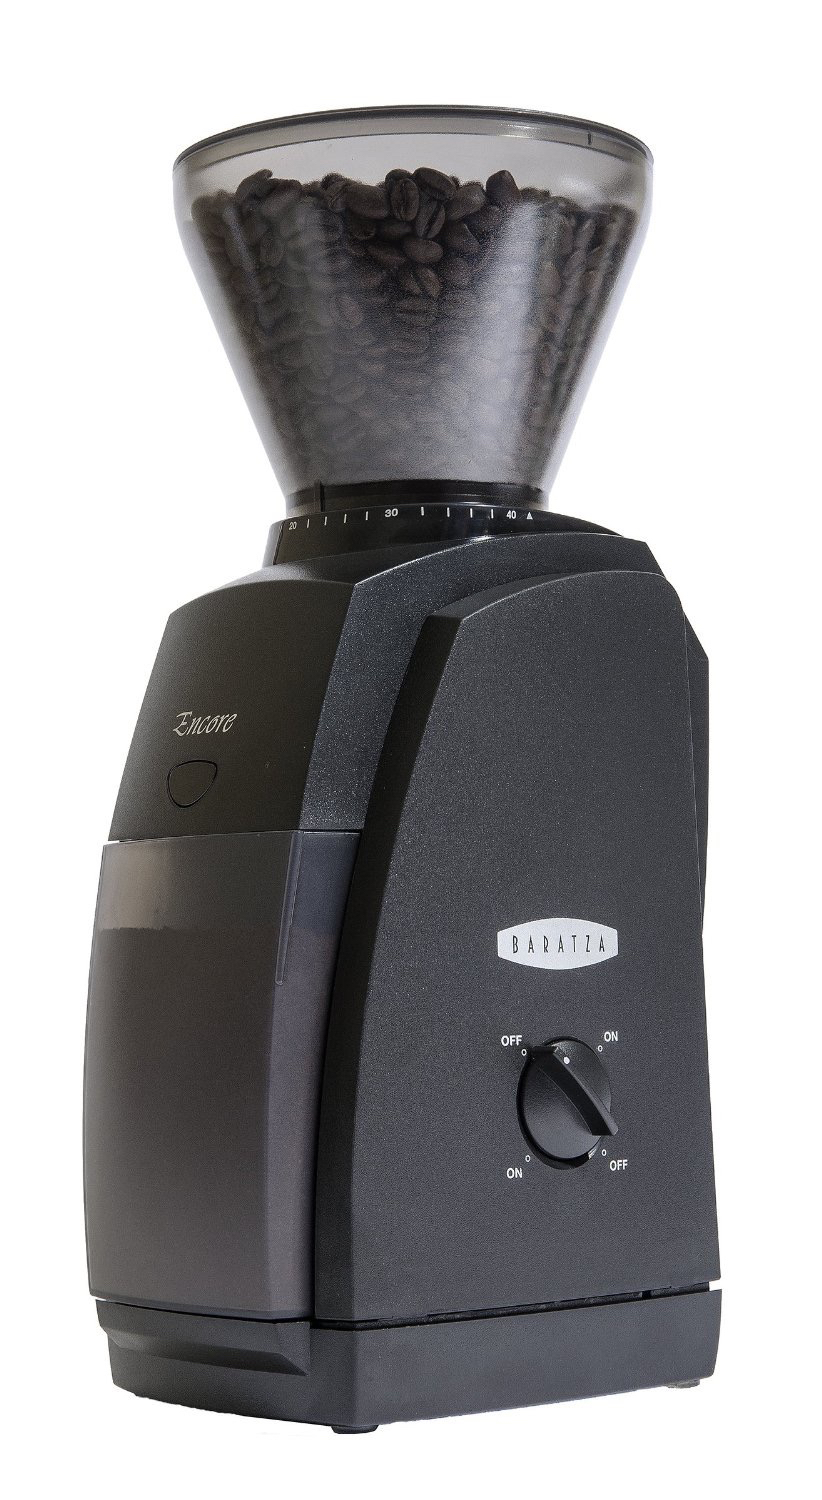
 Grinder - A good quality grinder is a must. Hand grinding works well for a single cup and a single drinker. For anything more, a simple high quality grinder is an investment worth having. The Baratza Encore is the gold standard high quality grinder. I’ve tried a lot of grinders and I can tell you look no further. This thing weights a few pounds as it has a beefy low RPM motor. It’s quiet and it grinds well. And it’s made in Seattle.
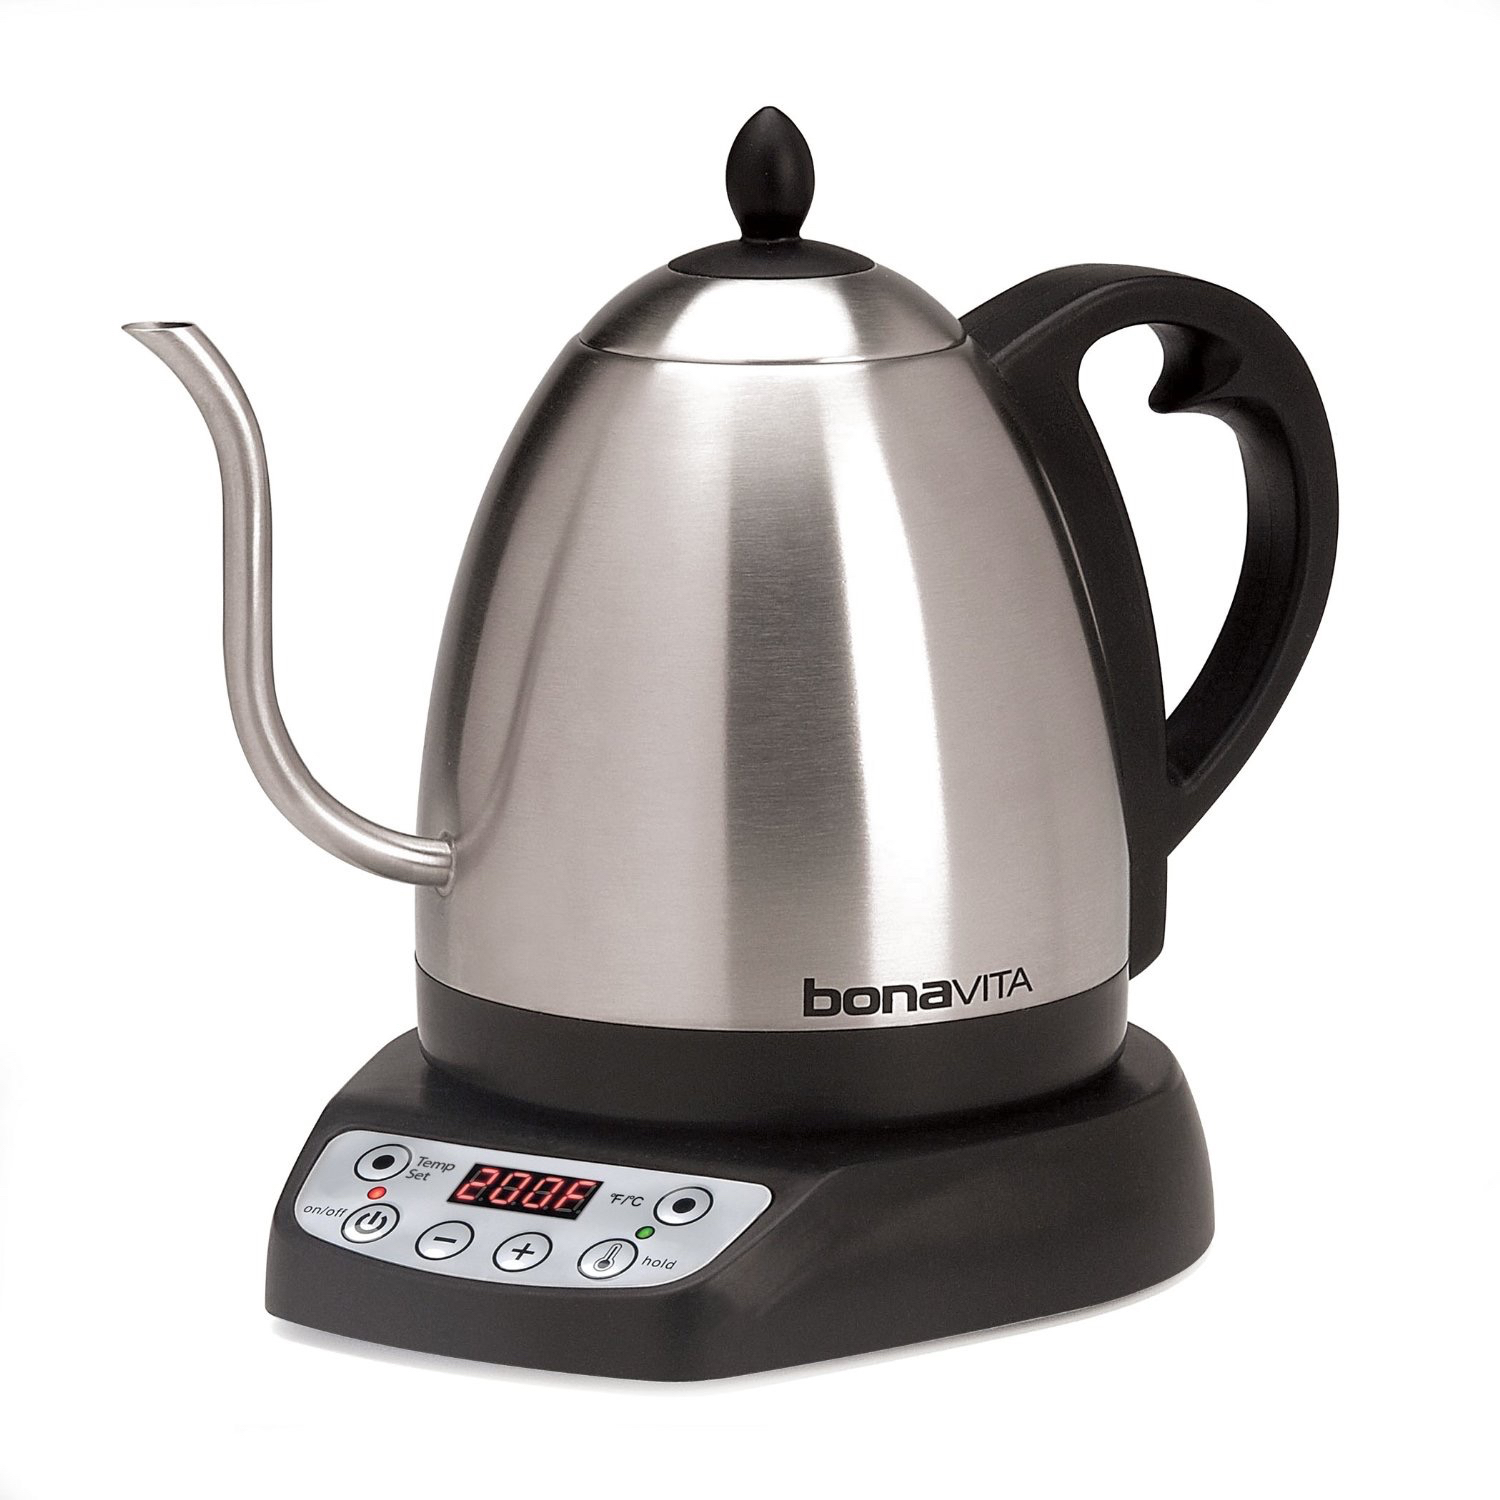
 Kettle - The Bonavita 1-Liter Variable Temperature is the best for a pour over system. Don’t even look at anything else. This thing rocks. We dial it in at 200 degrees, turn it on, and minutes later it’s done. The goose neck allows you to control the pour so you don’t scold anything and you can perform a proper Bloom.
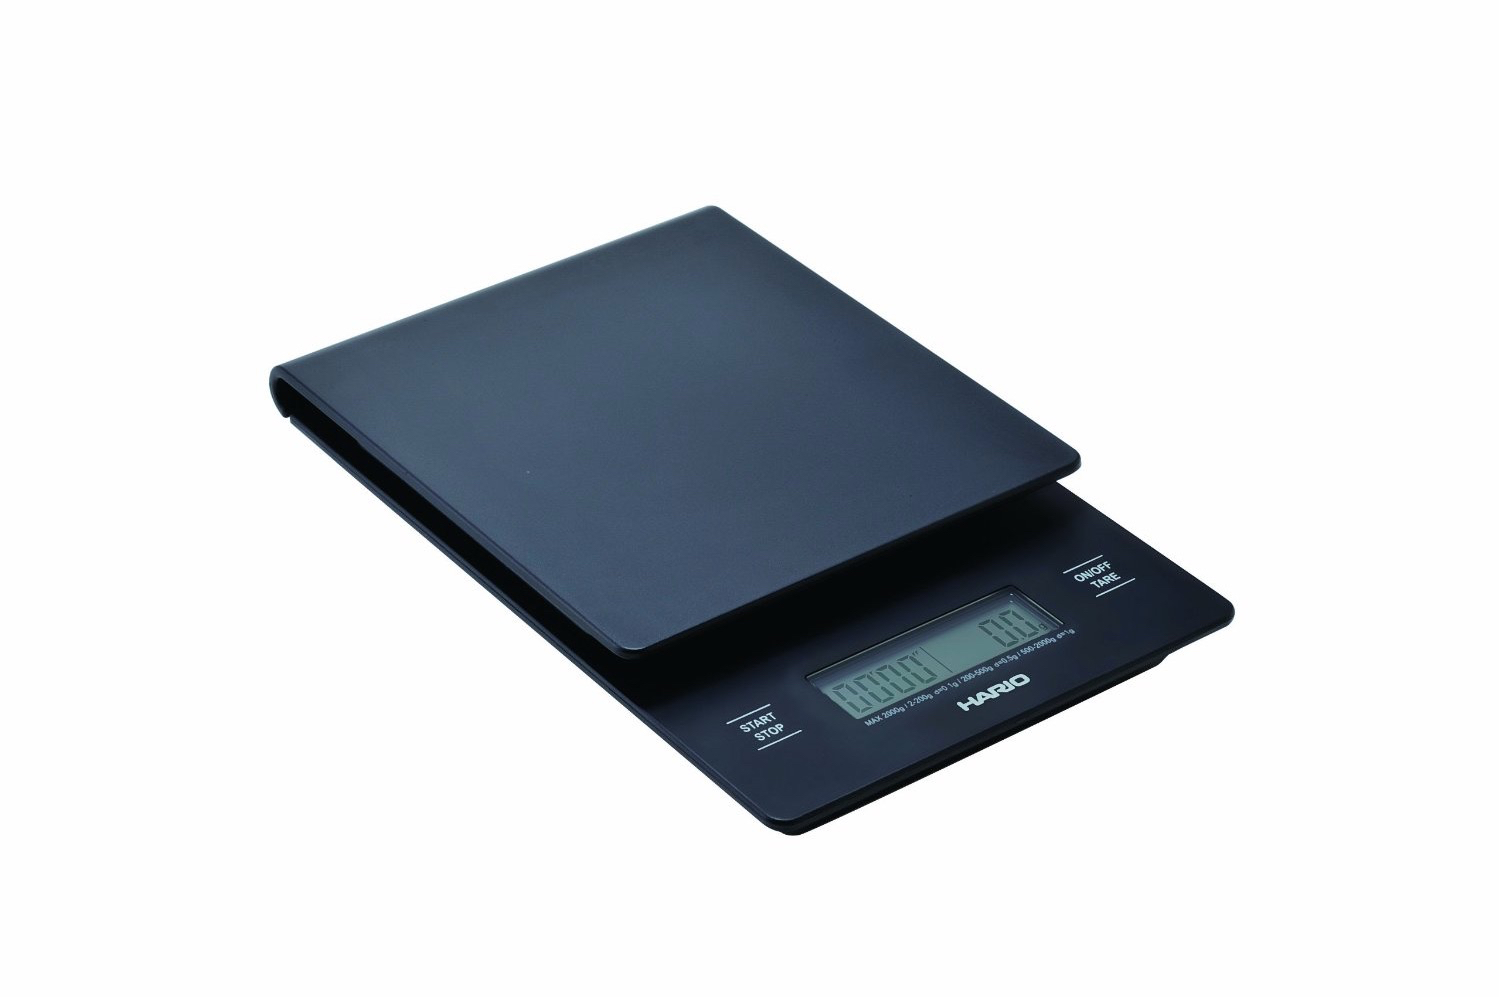
Scale - A lot of cooks rely on a scale these days. I believe a good quality scale is an essential kitchen gadget. This is true for coffee where it’s incredibly useful for measuring coffee and water. I also forgot that when it comes to the metric system, a gram of water is equal to a ml of water. So this makes it easy to deal with ratio of coffee to water. A scale I happen to like a lot for pour over coffee is the Hario Coffee Drip Scale/Timer. It only measures in grams, and it has a timer with auto shutoff. I usually use 18g of coffee and 220g of water. I place the mug on the scale, the pour over V60 on the mug (with a wet filter) and zero the scale. Then I add 18g of ground coffee, zero again, 18g of water to bloom, wait 30 seconds and then add the remaining 202g of water. If I got it right, the scale will read 220g when I’m finished pouring water. Then I let gravity do the rest.
 So, now that we’ve got the pour over technique and equipment out of the way, what did I settle on?
A quick note btw. It was the advent of the pour over system, and the quality of the coffee that cause my wife and I to realize that years of drinking from the Jura Super Automatic was not all that great. The V60 produced such an incredibly good perfect cup, that we could not deal with the cardboard taste of a cafe crema. I was not in search of anything to replace this, that is, until I read a blog post from my friend Kelsi.
Wilfa Precision Coffee Maker - This guy just arrived state side and Williams-Sonoma is the only place you’ll find it. Think of this device as an automated pour over coffee machine. It’s in the same league as the Technivorm Moccamaster, but less “coffee machine” and more “pour over” machine.
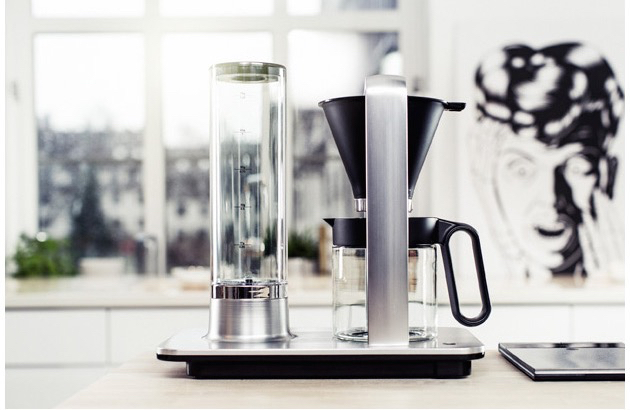 This thing is a work of art. I purchased it in black. It lives up to the hype. We can make 8 cups of coffee that tastes nearly as good as coffee from the V60. I’ve measured the temperature a few times and it’s in the 195 - 200 degrees range. It does not Bloom the coffee unfortunately, but it does have a neat volume flow control that allows you to control how long the water stays in contact with the beans. And it has a clever carafe with markings on it for the amount of water and coffee to use. For example, 250ml / 17g, 500ml / 33g etc. This makes for simple coffee production early in the morning.
I’d recommend this article to learn more. The neat thing about the Wilfa is that you can use it with a Chemed 8 cup or even my Hario V60, or I can use it with the built in cone holder and a single cup vs the carafe. It’s pretty versatile. The way I think about this machine is that it’s basically a kettle, with a water dispenser that goes into a custom cone and carafe. It also has a heating element that will keep a pot warm for an hour. Obviously this will cause a decrease in quality, but can come in handy.
That’s it. This is a great invention. The only thing that may top this is the Ratio Coffee machine. But at twice the cost, I’m not sure how much better it can be.

I debated for a while what rating to give the Wilfa. There are a few things about it that separate the coffee from the Hario V60. So in the end, given it’s not quite as good as a cup from the V60, I’m giving the Wilfa 4 stars.
★★★★☆
Great. Worth purchasing.